Y’all!!! I think I need a personal chef. Or a personal organizer. Or a housekeeper.
Because I just can’t do it all lately. Do you remember that I mentioned a few posts back that we moved to South Carolina? (From Iowa.)
We closed on our house on November 3rd. Birthday party for SG was scheduled for November 21st. That’s a lot to do in a short amount of time. And the next week was Thanksgiving, which I hosted and prepared almost everything for. And then Christmas. Let’s just say: I’ve. Been. Busy.
So SG wanted a Barbie themed birthday party. I scoured Pinterest for ideas. I found some amazing ideas. I did not want her party to be a Pinterest fail. Nuh-uh.
I was determined to make her a beautiful Barbie cake. Like the Barbie in the cake kind. I was so nervous. I didn’t even practice the cake before her party. I wanted to and planned to, but ran out of time.
I even found a Barbie box on Pinterest. One for the kids to pose inside of for pics. I had to have it! I have my graphic designer brother to thank for the Barbie box. Way to go Uncle Josh!
Here’s how the Barbie box turned out:
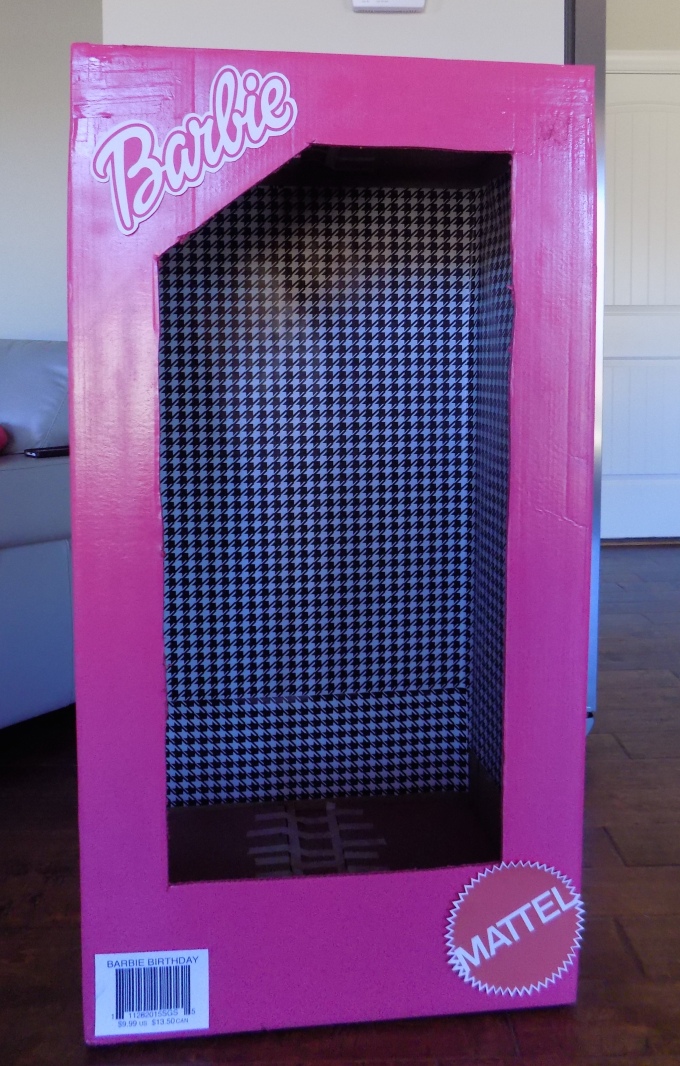
The Barbie box was inspired by these pins here and here. In the end, we looked at a few pins and my brother did his own thang.
Each of our guests took pics inside the box. It was just adorable!!!
And the cake…
Well, I’ll just show it to you:

I still can’t even believe we made this cake!!!!!!!!!!!! (Yes, it deserves that many exclamation marks.)
Here are the pins that inspired this cake:
This one from The TomKat Studio. This one had so many inspirations!
And also this one from Blissfully Sweet.
None of those cakes were safe for us, but I knew I could do it. Or I could at least try my hardest!
In preparation for frosting the cake, I knew it was time to finally buy a nice icing set. I scoured Amazon and the reviews convinced me to purchase this Dessert Decorator Plus. This tool was crucial in the frosting of this cake. I highly recommend it.
We browsed several Barbies in the stores and SG decided on this Barbie:
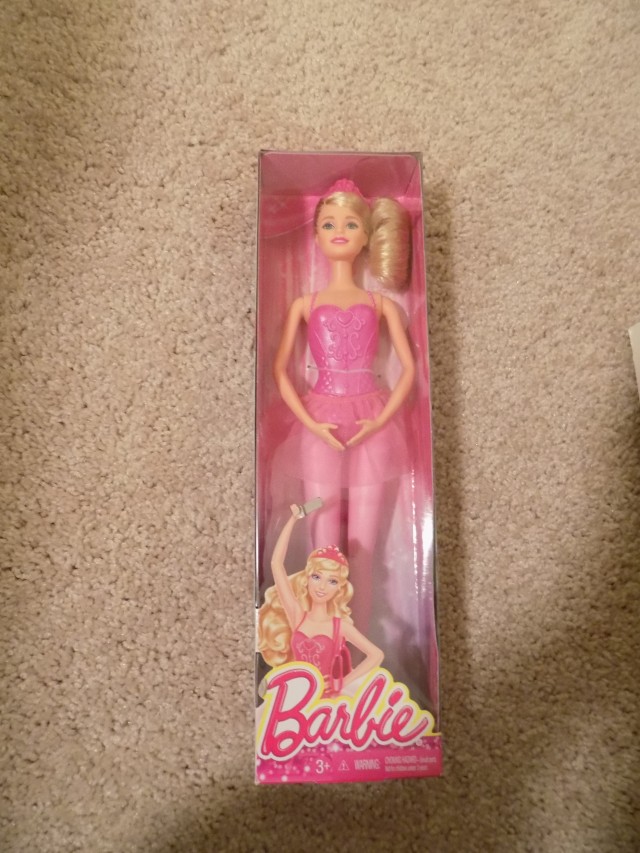
SG’s choice. I liked this Barbie for so many practical reasons: pointy ballet shoes are easier to poke her into the cake, her top and hair are pretty and most importantly, she is PINK!
Here’s how I made the cake. I decided to go with our handy dandy and reliable wacky cake. Otherwise known as crazy cake or depression era cake. I made two batches. I made 4 round cake pans total. Two chocolate and two vanilla round cakes.
Wacky Cake
(Double this recipe.)
Dry Ingredients:
- 3 cups flour
- 2 cups sugar
- 6 Tablespoons of cocoa (for vanilla cakes, omit cocoa)
- 2 teaspoons baking soda
- 1 teaspoon salt
Wet Ingredients:
- 3/4 cup oil (I use canola)
- 2 Tablespoons vinegar
- 2 teaspoons vanilla (use 1 Tablespoon vanilla if making vanilla cupcakes)
- 2 cups cold water
Directions:
- Preheat oven to 350 degrees.
- Prepare your round pans. Grease with vegan butter and add a little bit of flour.
- Gently tap the pan to evenly spread the flour throughout the pan. Throw away the extra flour.
- Put dry ingredients in a mixing bowl and stir with a wooden spoon.
Add wet ingredients. Beat well until blended. - Pour mixture in the two round pans. Try to get the same amount in each pan. I eyeball it.
- Put the pans in the oven and bake.
- The round cakes will take approximately 20-35 minutes. I used convection bake and it baked two cakes in about 20 minutes. When I don’t use convection bake it takes a little longer. Set your timer for 20 minutes and add extra time in small increments if needed.
- Let cakes cool on a wire rack. Place a large plate on top of the cake and flip over. The cake should come right out. If not, you may have to gently prod the cake out.
We decided to wrap the cakes in foil and freeze them overnight. We did this because we wanted the cake to be firm for shaping it the next day.
The next morning, we unwrapped the cakes.
Here’s what we used to make the doll shaped cake. This website was the one that convinced me I didn’t have to buy one of those big dress shaped cake pans. I could use simple round pans to make my barbie cake dress, as I mentioned above. Thanks for the Pinspiration!
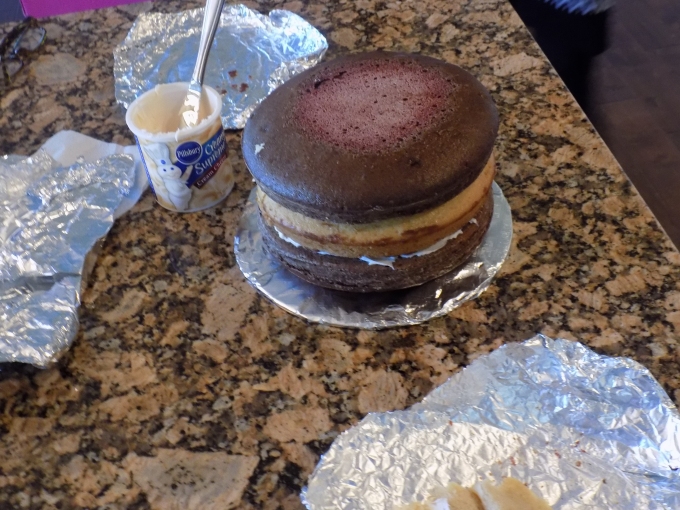
I bought a cardboard round cake board from Party City. We wrapped that in foil. We put one round cake on the board, but used icing to “glue” it down. We put a light layer of frosting on top and used that as the glue to hold the next layer. We alternated chocolate and vanilla cake layers.
Here’s the steps with photos:
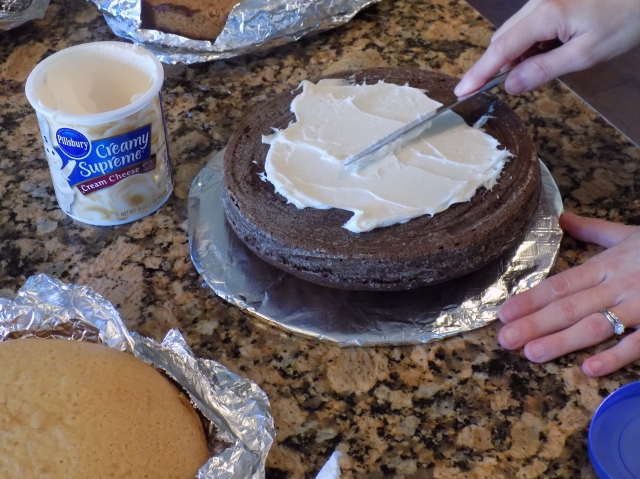
The frosting is the glue between each layer. This “cream cheese” frosting is dairy free and makes the cake even more scrumptious!
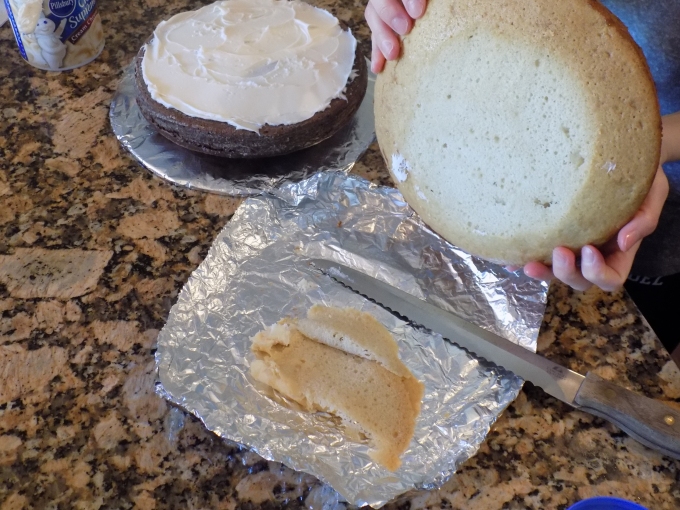
We had to trim the puffiest part of each round cake except for the base and top layer. Ok- I guess we trimmed 2 of the 4 cakes!
Layer 3

This was just tall enough for our Barbie. Don’t forget to wrap her legs in plastic wrap!
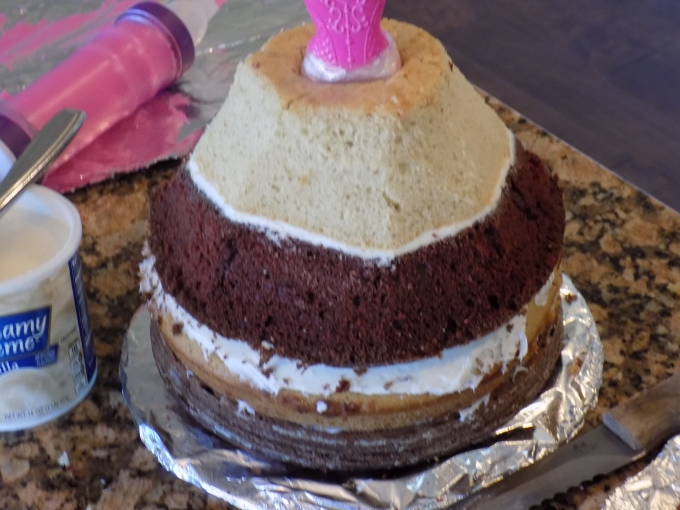
Barbie’s hips will be covered with frosting.
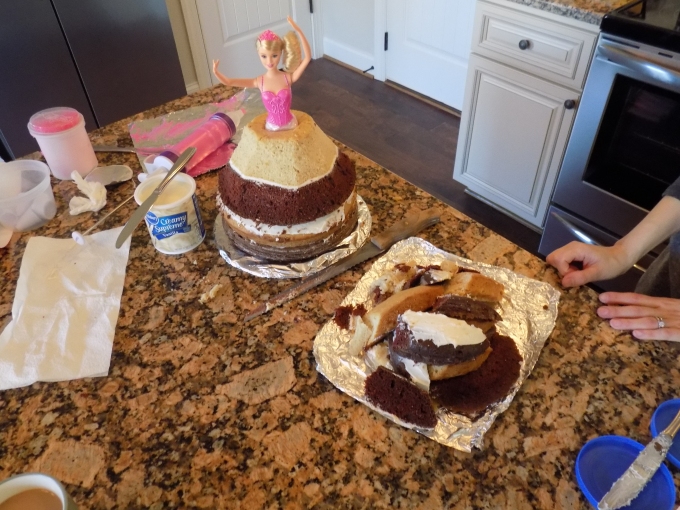
The Huzz used the serrated knife to soften those hard angles. We didn’t snap a pic of it before the frosting.
We gave it a quick layer of frosting to prevent crumbs from showing through her “dress.”
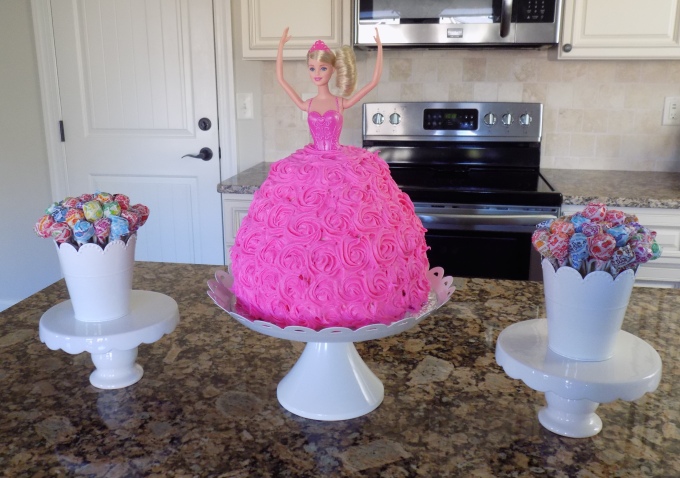
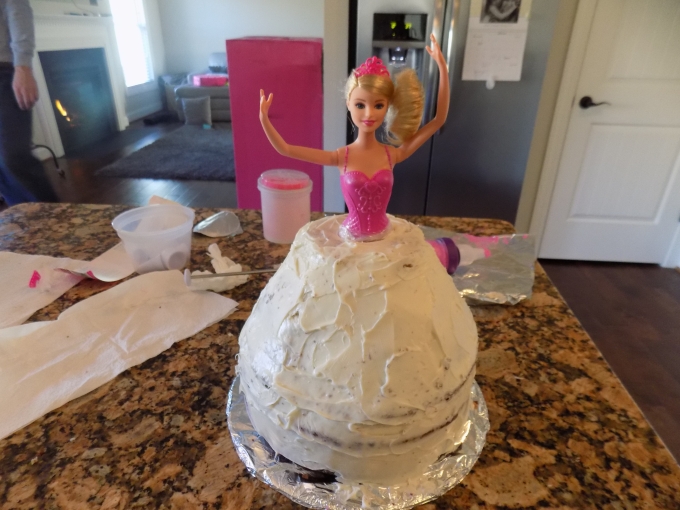
Barbie in all her glory!
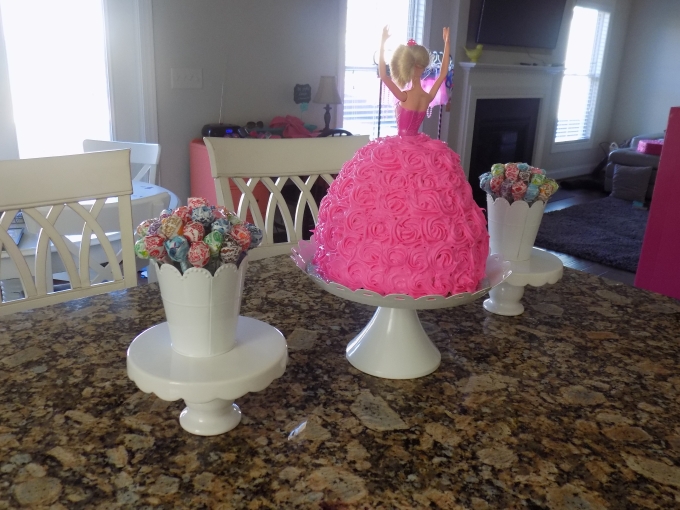
Barbie from another angle.
I started the frosting in the middle of Barbie’s dress in the front. I made one rosette and kept going in a line horizontally until I went all the way back around. Then I worked my way one row at a time. When I got to to Barbie’s hips, I did a quick line around her waist to make sure the plastic wrap didn’t show. I used 3-4 cans of Pillsbury frosting for her pink rosette dress.
We are so pleased with how the cake turned out. SG was blown away and super happy!
I am thrilled to show the world that us food allergy mamas can rock it out! FAM’s (food allergy mamas)- WE GOT THIS!

That is fantastic!!! Love it!!
Thank you! It was a labor of love!!
This is just beautiful! And I love that it’s allergy friendly – perfect for our family. Definitely on my “to make” list for one of my daughter’s upcoming birthdays!!
Thank you! I hope it comes together for you- I’m sure it will! I still can’t believe we made this cake!!! 🙂
Pingback: Allergy Friendly Cakes & Cupcakes | Blessed Little Family
Pingback: Homemade Rapunzel Cupcakes: Dairy & Egg Free | Blessed Little Family
Pingback: Homemade Shopkins Cookie Cakes! | Blessed Little Family
Omg so beautiful!!! I never knew pillsbury frosting was non dairy.Did u add pink coloring to make the frosting pink or is it strawberry frosting?
Thank you Courtney! I did not add pink coloring. The frosting (vanilla neon pink) came that way. We have a few Pillsbury frostings that we use regularly that are dairy free. Please make sure to read the label because recipes can change. As for the strawberry frosting, the last time I used one it was dairy free but I personally didn’t like the flavor. Our house is divided on that one. Lol. But it’s a softer pink. It would work beautifully, too.
Hi! Did you use 3-4 cans of frosting for the entire barbie or just the outside of the cake, Thanks!
Hi Gina,
The 3-4 cans was just for the outside of the cake- the pink part. I can’t remember if I used 1 or 2 cans of white frosting for the glue between the layers and the thin crumb coating. I’d go with 2 of those just to be safe, although 1 may cover it. So, 3-4 cans of colored frosting for the dress and 1-2 for the “glue” and crumb coating. I hope this helps!