Hello Again. And Bread.

Bread Mix

Hey y’all!

I was so excited to get into a good blogging groove again. And then we decided our chosen curriculum for homeschool was not the best fit for our daughter. So we switched gears, revamped and have finally hit a good groove again.

Good groove= mommy has time to blog (sometimes!)

Today I was measuring out the ingredients for my bread machine and decided to pre-measure the dry ingredients to make future bread making even easier. The recipe by itself is pretty easy. But let’s face it. Some days even easy recipes are hard for me. We are selling our house, homeschooling and then there’s just life in general. And no eating out, because, well, I just don’t trust that other chefs/cooks won’t accidentally make a mistake with my daughter’s food. So I prepare all of our food.

I digress.

Here’s how my next three times of making bread will be even faster and easier.

I:

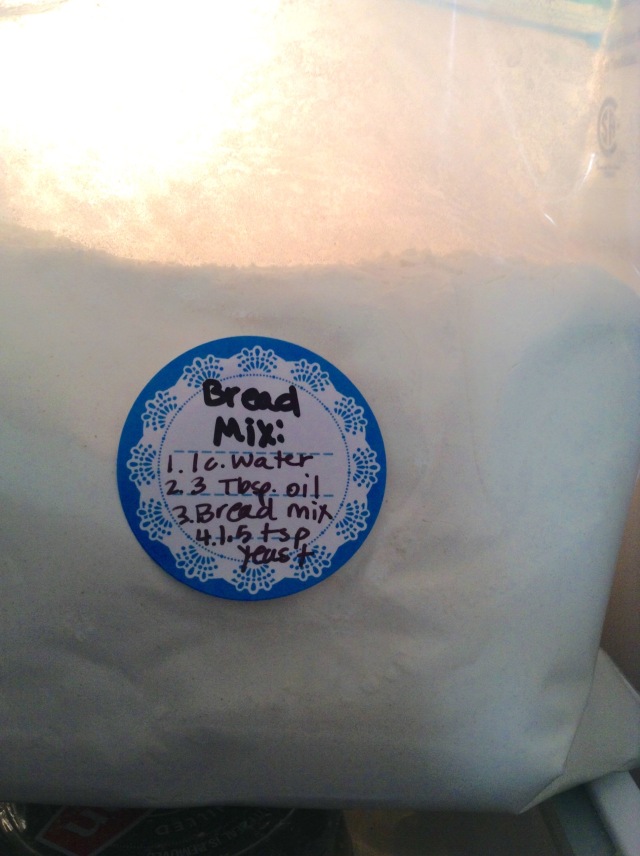
1. grabbed a few baggies,

2. pre-measured the dry ingredients, and

3. added the steps including missing ingredients in order.


Bread Machine

I added a sticker because I love stickers.  Stickers are not necessary, but, why not?  🙂

Click here for the bread recipe I’ve been using.  It’s officially called “White Bread for 1.5 lb Loaf Breadmaker.”

I’ve also made Hamilton Beach’s recipe for french bread and it’s really good, too.

Bread Sticker

Post-it Notes Homeschool Board

Post-it Notes Board

So, have you noticed I’ve been writing about homeschool A LOT lately?

I’m all in, shu-gah! 🙂

I feel like I live and breathe homeschool.

I feel like I’ve got menu planning and cooking under control. Cleaning, too.

Homeschool is our newest adventure and I’m always searching for the best I can buy/give to my daughter.

This is my latest homeschool creation.

I have lots (aka too many) decorative paper pads from Michael’s stores. And I have a laminator and lots of Post-it notes.

Last Friday, I decided to put up 1 Post-it note per subject with a specific activity written on it. I grouped them all together on a wall. SG was in charge of choosing which subject we did until she pulled all of the Post-it’s off of the wall.

It was a hit!

SG loved it because she was “in charge.” I want her to feel some control over her schooling.

It also gives me a glimpse into which subjects she likes best because she chooses those first.

The verdict?

DEAR time and writing are always chosen last because they are her “least favorite.”

DEAR is Drop Everything And Read. She chooses her books, her location, her stuffed animals and I set the timer for 15 minutes. Sometimes 20. She never wants to do it, but here’s the kicker- once she’s set up she loves it! She reads happily in a cozy little spot of her choosing.

DEAR Time

This board was so easy to make. I cut down a 12×12 sturdy decorative piece of paper from one of my paper pads. I used my Scotch laminator to laminate it. I use a magnet to hold it on the fridge. I put my Post-it notes on the board. As we do each Post-it note lesson, I put the note on my lesson planner.

At the end of each lesson, every few lessons and sometimes at the end of the school day, I stop and review the Post-it notes and write in my lesson planner what SG learned that day. (another state requirement)

So there ya have it. My Post-it Notes Homeschool Board. Made from materials on hand. Yay!

Random thought:  This could easily be made into a menu planning board.  Write out meal ideas for the week and pull them off as you make them.  Or a goals and inspiration board.  Or… a honey do list!  I may have to find some manly decorative paper and make the Huzz one!!!  Wouldn’t he just LOVE that… haha!  If I used my smaller Post-it Notes, I could squeeze in more notes for that honey do list.  🙂

Post-it Notes Board 2

The smaller Post-it Notes are perfect if you have more tasks to fit on the board.

Can you think of any other uses for a board like this?  I feel like the possibilities are endless.

My Grown Up Journal

In my last post, I mentioned I’m becoming a student of my daughter.

My cousin suggested keeping a reflection journal for homeschool.

I tried it because I had recently purchased this beautiful notebook from TJ Maxx for absolutely no reason other than it was pretty.

Journal

I wanted to use my pretty notebook!

So, I started to write and reflect.

Can I tell you something?

It has been amazing!

It has helped me focus on what worked and didn’t work each day. I try to write every night, although that doesn’t always happen.

I like to write about the highlights and the things that didn’t work. Like coloring. I’ve learned that my daughter doesn’t like to color in the pictures in her workbooks. We had an unpleasant time when I made her color the pic in her workbook. I mean, come on! It’s coloring! 🙂 Who doesn’t like to color?

My daughter.

In reflection, I decided if she doesn’t want to color the picture, she can just leave it blank. Really, does it matter? The next day, she had another “Color this camel” page. I calmly asked her to color just one thing, to see if she would color one small thing without complaining. If she complained, I’d just let it go, because, really, that’s a minor thing. She chose the smallest picture- a sun. She happily colored it and then we moved on. Victory!

I also noticed if she is asked to draw something, she happily draws a picture and will work on it for a long amount of time. And she’s very proud of her drawings.

The verdict? I’m not going to force her to color a picture and argue with her about coloring. Not worth the effort. If she wants to draw a picture or just skip the coloring, I’m okay with it. There are bigger worries in life. And the coloring doesn’t affect her learning.

Blurred Journal

My journal- blurred out for privacy!

I don’t think I would have even thought about this if I didn’t sit down at the end of each homeschool day and put my thoughts on paper.

I haven’t journaled in years, but I’m loving it!!!

What about you, my friend?

Do you journal? Do you homeschool? Do you journal about your homeschool day? I’d love to hear from you in the comments.

Week 2 of Homeschool and Puppy Chow


We have completed our second week of homeschool and already I’ve made big changes.

I’m becoming a student of my daughter.

I’m watching her learn, noting what works well and what doesn’t, and adjusting from there.

We purchased the complete curriculum LIFEPACS from Alpha Omega. It totally spoke to my teacher soul! Small workbooks (called worktexts.) Self tests. Tests. Perfect for me and the work samples I need to keep in her portfolio (another state requirement.)

Not so perfect for my daughter.

She’s okay with it. But after a great first week, the shininess and newness of homeschool wore off and she started to complain. A lot. She was doing worktexts for every subject.

To mix it up, I introduced Five In A Row. It’s a completely different approach to learning. We read a book Five Days In A Row (get it?) and learn and explore through the context of that book. Social studies, science, literature, math, health and art. All through one great read aloud!

I tried FIAR (Five In A Row) this past week and it was a hit! SG didn’t even realize we were working on geography (finding China on a map, locating the Yangtze River, discussing the size of the river, looking at online photos of the actual Yangtze, and discussing the number of people who live by the Yangtze.) We also discussed the fact that her maternal Great Grandmother was just 2 years old when ‘The Story About Ping’ was published and her little eyes shot wide open. We discussed what makes a book a ‘classic.” All on day one of our “row” of the book ‘The Story About Ping.’ She was totally engaged the entire time!

It. Was. Amazing!

We are still using our LIFEPACS. We spent a pretty penny on that set. But instead of their social studies and science being the spine of our learning, I’m going to let FIAR become our spine for those subjects and sprinkle in some LIFEPACS here and there.

I do love our LIFEPACS. We will continue to use the language arts, math and Bible LIFEPACS as the spine for those subjects.

However, I have purchased the first two books in the math curriculum Life of Fred, which I’ve heard so much about! All good, of course!

I plan to introduce Life of Fred next week. I’ll let y’all know how that goes. It looks like a wonderful and fun way to learn math.

Here’s how we ended week two- with a delicious and no bake treat- Puppy Chow!

Puppy Chow

This is my childhood friend’s recipe. I substitute vegan butter and Enjoy Life chocolate chips to make it safe for SG.

This was a fun end to our great week of learning.

Safe Puppy Chow

Ingredients:

  • 1 stick vegan butter
  • 1 cup peanut butter
  • 1 bag safe chocolate chips
  • 1 box Crispix cereal
  • 1 box powdered sugar

Directions:

  1. Place vegan butter, peanut butter and chocolate chips in a bowl and microwave in 20 second increments until melted. Stir well.
  2. Put cereal in a large bowl. Pour mixture over Crispix cereal.
  3. Stir until cereal is coated.
  4. Pour in a large grocery bag with a box of powdered sugar.
  5. Shake. Let stand. Shake several times until coated.

Note:  This can easily be made peanut free by substituting with almond butter, Sunbutter or any other peanut butter substitute.  I made it once with Sunbutter and it turned out just fine.

1st Week of Homeschool: A+!!!

Our first week of homeschool is over and done with.

If I were the grading type, and I am… I’d give our week an A+!!! Yes, with three exclamation marks!

When I started with my long range plans, I mapped out a general “we should be in this chapter by midyear….” And then I got really crazy and wrote down exactly how many pages SG should complete per day per subject to reach the goal of finishing the curriculum. Then I read the chill out blogs and erased the page number requirements.  Er, guidelines.

And I did some soul searching and decided it was time to relax. I want our learning time to be enjoyable, fun and full of excitement! Ok, I know not every subject will be super exciting, but I want SG to grow to love learning! I have to take the public school mentality out of my brain, and imagine a cozy, home learning environment.

I am so thankful for all the blogs I’ve read that said to relax, don’t stress and enjoy our learning time together.

People keep writing, “Learning happens all day, throughout the day, in natural environments and through play.” It’s so true. Now that I’m paying attention, I see SG thinking through things and asking questions all day long.

Today at breakfast, SG was talking about the difference in age between the Huzz and me. (Almost 2 years)

“Mom, when you’re 40, will Daddy be 42?”

Yes.

“And when you’re 42, Daddy will be 44?”

Yes.

She would’ve kept going but I was actually writing this post and told her to eat her breakfast. Why did I stop her? I’ve still got so much to learn!!!

There she is, eating breakfast and working on counting by 2’s. Just because she wanted to and has a curious mind. 🙂

(We just finished week 2. I have written about that and it’s coming soon. I’m just behind in posting. I’m so excited to actually find time to blog this school year!)

A Fresh Start

Yesterday my daughter started first grade. We are officially homeschooling.

Last year for kindergarten we did an online public school and it wasn’t a good fit for us. I called it homeschooling, but really, it was public school at home.

We have only schooled for two days and already the change is amazing! Both of us enjoyed our laid back and relaxed learning time. My daughter learned plenty in the past two days and actually enjoyed doing it.

The highlight of her first day? Studying the bible! Be still my heart.

She also enjoyed our read aloud, which was done on our sofa, complete with soft pillows and a cozy blanket.

Last year sucked the joy out of both of us. I never had the energy to write a blog post because I was just plain worn out. We just don’t trust restaurants and I cook every meal my daughter eats. So, between cooking all the time, cleaning, the online school and life in general, I was super frazzled.

And my daughter didn’t like learning last year either.

This morning, day two of our new journey, my daughter walked into the kitchen and exclaimed, “When are we going to start homeschool?!?!”  What a huge change!!!

This year is a fresh start. I have plunged deep into homeschool blogs, Pinterest boards, and curriculum reviews. I have printed and downloaded like a mad woman. I even purchased a laminator! It’s been so much fun preparing for teaching first grade (Again! I’m a former public school teacher. Once upon a time I taught first grade.)

Day one and day two are officially in the books. I can’t wait to see what the next 178 days of first grade holds for us! (My state’s requirements is 180 days of school under our homeschooling option.)

Maybe I’ll have the time to even blog more this year! 🙂

Until later, my friend.

Homemade Shopkins Cookie Cakes!

We were invited to a 5th safe party this year!  That’s a record, friends!  We are always humbled, grateful, excited and a bit nervous when we go to parties.  The anti-histamine the allergist has SG on has helped tamp down her constant contact reactions tremendously, but it still occasionally happens.

So, my sweet cousin N invited us to her daughter’s party and offered to have only safe foods.  I offered to make the cake.  N requested a Shopkins Kooky Cookie cookie cake.

The Huzz and I are always up for a good cake challenge, and we tackled this one the way we do best- together.  I baked the cookie cakes and he did all the decorating with the frosting.  Good ‘ole Pillsbury frosting.

We surprised N with an extra cookie cake- Cheeky Chocolate.  As I shaped Kooky Cake with the raw dough, I realized I had enough dough left for an extra cookie cake.  I showed the Huzz several images and he picked Cheeky Chocolate as one he thought he could well.

Without further ado, here are our results:

kooky-cookie

cheeky-chocolate

The baking of the cookie cakes was my part.  I simply use this food allergy friendly chocolate chip cookie recipe from Silk.  Click here for the recipe.

I take about half of the dough per cookie cake and shape it with my hands until the desired shape is reached.  For Kooky Cake, I shaped it into a circle as big as my round pizza pan.  We put parchment paper on the pan and shape the dough on top.  For Cheeky Chocolate, I formed a tall rectangle.  I baked the cookie cakes on 350 on convection for 13 minutes.

We let the round cake cool almost completely before the Huzz cut out the bite marks in Kooky Cake.  Then we let the cookie cakes cool completely before the Huzz decorated the cookie cakes.

We used these Pillsbury frostings:  1.5 cans of chocolate fudge, 1 can of cream cheese (it’s dairy free!), one can of vanilla hot pink frosting and one can of vanilla neon blue frosting.  And my frosting tool that helped me create SG’s beautiful Barbie cake last year.

As for the cake decorating, an artistic person is definitely a plus.  I could not have made these cookie cakes look like this.  The Huzz is artistic and is the one who made these cakes shine.  So, if you wanna try this at home – (and you should! If we can do it, so can you!) then an artistic person is most definitely gonna help make your cake beautiful.  (The feet and hands are just frosting- no cookie cake underneath.)

The cookie cakes were a hit, my daughter had a blast and there was not a single piece of cake or frosting left.  I’d say that was a successful party!

Thank you N for having a safe party when you didn’t have to… you’re pretty rad!

(Did I just date myself by using rad?)  Haha!

Happy cookie cake baking, my friends!

Homemade Rapunzel Cupcakes: Dairy & Egg Free

rapunzel-cupcake-close-up

Hey friends!

We went to another birthday party today!!!

In case you didn’t know, that is BIG NEWS in our house. Our allergist has recommended that our daughter only go to safe parties until we get her contact reactions under control. So that means we usually cannot go to most parties, as we really don’t expect everyone to make it all safe for us. We usually go to 1-2 birthday parties a year.

We have had a busy year- we have gone to 4- count them-4!- parties outside of our house this year, y’all!

Today, our little cousin E celebrated her 4th birthday with a Rapunzel themed party. My cousin picked all safe party foods so SG could go. I made the cupcakes Rapunzel themed.

I am always up for a good baking challenge.

My go to cake is always our good ole wacky cake. I made a double batch of vanilla cupcakes. I bought 4 cans of purple Pillsbury frosting (read the labels please!), a bakery cardboard cupcake holder, fade proof cupcake liners, and downloaded the cutest Rapunzel printable PDF to top the cupcakes. Click here to see where I purchased them from and to see this lady’s other designs.

It took me less than 5 minutes to whip up each batch of cupcake mix (this is from scratch- no box mixes here!). So, 10 minutes to make enough batter for 48 cupcakes. See? You can do this, too! We got this, food allergy mamas and papas (and non food allergy friends, too!)

I always like to bake my cupcakes in advance and freeze them. That just takes the pressure off of me on the day of the party. Then I get to concentrate on icing them. You could easily do everything in one day.

So, here’s how I made these delicious- and, if you don’t mind me tooting my own horn, adorable Rapunzel cupcakes.

In advance, prepare the cupcake toppers. I chose to purchase, download, print, cut and tape toothpicks to the Rapunzel printable.

rapunzel-toothpicks

Make a double batch of wacky cake batter and bake as cupcakes. My cupcakes bake on convection at 350 degrees for 15 minutes. (The wacky cake recipe is at the very end of this post.)

Let cupcakes cool completely and then either freeze them or move onto the frosting step.

I use this frosting tool with the pronged tip to frost the cupcakes. I started as close to the edge of the cupcake as I could and just went round and round until I hit the middle. When I stopped frosting, the frosting went up in a line. I used the tip of the toothpick to push the frosting tip down as I inserted the toothpick into my frozen cupcakes.

I also kept the decorated cupcakes in the bakery box (I bought that from Party City) in the fridge until it was time to leave for the party.

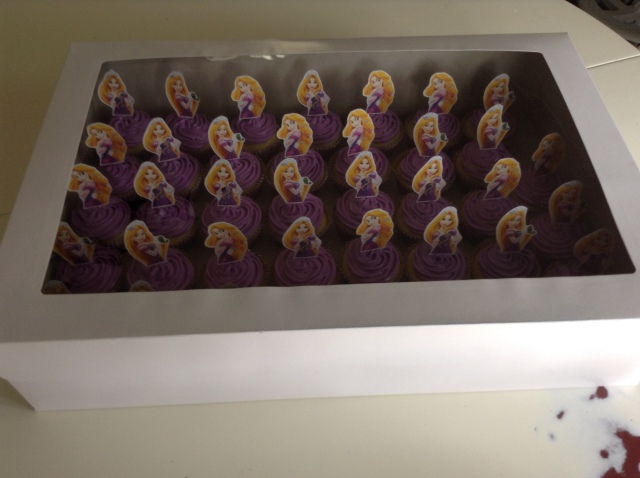
rapunzel-cupcakes-in-bakery-box

This pic is kinda dark but I am so thrilled to have the cupcakes in this box to help them look like they came from a bakery!

Here’s my tip on the bakery box. It’s very flimsy. I’ve never used one before so I had no idea. I had a mini heart attack as I lifted my completely cupcake filled box and took two steps towards the fridge and the bottom of the box started to give way. Somehow I balanced it all- it was so wiggly. The Huzz happened to walk in right as the catastrophe was happening and he swooped in and saved the day! (And the cupcakes!) Next time, I will also purchase an extra cardboard cake thing- what do you call those? I used one for my Barbie cake. Anyway, I’ll Scotch tape the bottom of the box and also use a cardboard meant for cakes for added sturdiness. We ended up carrying the cupcake box under a cutting board. It worked. 🙂

So, that is how we made our safe Rapunzel themed cupcakes.

rapunzel-open-box

I added in two extra cupcakes to fill the box that didn’t have picks.  I didn’t want the cupcakes falling over during the drive to the party.  

Here’s a random side note. Another little friend was at the party and wasn’t going to be able to eat the cupcakes until the mother found out the cupcakes were dairy and egg free. I had no idea another little friend with food allergies was there. That just blessed my heart that another little friend was able to freely and safely partake of all the food!

rapunzel-open-box-close-up

So, there ya go, my friends. Another yummy, safe, and fun birthday cake.

rapunzel-at-party

Here the cupcakes are in action.  My cousin also made Rapunzel Fruit Tower kabobs.  How cute!

rapunzel-skillet-plates-cupcakes

My cousin also made these adorable “skillet” paper plates.  She’s so crafty!

Wacky Cake
(Double this recipe if needed. Each recipe yields approximately 24 cupcakes.)

Dry Ingredients:

  • 3 cups flour
  • 2 cups sugar
  • 6 Tablespoons of cocoa OR For Vanilla Cupcakes, omit cocoa
  • 2 teaspoons baking soda
  • 1 teaspoon salt

Wet Ingredients:

  • 3/4 cup oil (I use canola)
  • 2 Tablespoons vinegar
  • 2 teaspoons vanilla (use 1 Tablespoon vanilla if making vanilla cupcakes)
  • 2 cups cold water

Directions:

  1. Preheat oven to 350 degrees.
  2. Put dry ingredients in a mixing bowl and stir with a wooden spoon.
  3. Add wet ingredients. Beat well until blended. (I use a stand mixer.)
  4. Pour using 1/4 cup batter per cupcake liner.
  5. Put the pans in the oven and bake for approximately 15 minutes per batch, or until a toothpick inserted in the middle comes out clean.

Simple Tofu and Veggie Stir Fry

The tofu love fest continues!

Last post, I mentioned I have made a stir fry with tofu. It was just what my veggie stir fry recipe needed. The stir fry is good on its own. But the tofu bumps it up a notch and adds more protein.

The hardest most time consuming part of this recipe is chopping the veggies. To save time, I have started buying shredded carrots. It’s double the price of the regular carrots, but this Li’l Mama needs some easy in her life. Can I have the STAPLES  Easy button please???? 🙂

I digress.

You can use any veggies you have in your veggie crisper. I like to use chopped broccoli, shredded carrots, diced zucchini and diced red bell peppers. If you’re able to, you can buy the store bought chopped veggies (I’m feeling a little envious now…)

Here’s my little tip on the zucchini:
Cut it in half longways. Then use a spoon to scoop out the seeds and the guts. Then chop or dice the ‘chini.  I didn’t do this for a long time and my zucchini was always mushy. I somehow figured out the scooping out the guts part and no more mushies!!!

Here’s another little secret. Sometimes I use rice and sometimes I use spaghetti noodles…and tonight I used penne noodles. Not very stir fry-ish, but I am all out of spaghetti noodles. For stir fry nights, I like to use spaghetti noodles every now and then.

I special ordered a case of safe spaghetti noodles and paid a small fortune to ship them… and they are LOST! 😦

Who needs $60 back anyway? $35 ish for the noodles. $25 ish to ship.

Ouch.

Note to self, always insure your noodles. 😉

Anyway, I mix up the rice and noodles to make the dish seem different.

Afterall, variety is the spice of life…

Or so they say. Who are they, anyway?

I digress.

Here’s how to make the food.

Chop some veggies and cook in a wok.

dscn2745

Veggies.  The steam always fuzzes up my pics.  Oh well.  🙂

Boil some noodles or throw some rice in a rice cooker.

Press some tofu and do a quick soy marinade.
Grill/sauté tofu ’til kind of crispy.

dscn2748

Grilled Tofu.  Mmmmm.

Throw it all in a bowl.

Done.

See? Simple.

tofu-veggie-stir-fry

Tofu & Veggie Stir Fry

Now, for the actual recipe.

Simple Tofu and Veggie Stir Fry

Ingredients:

  • Chopped and diced veggies of your choice (I use an entire head of broccoli, 2-3 zucchinis, 1 red bell pepper and at least a cup of shredded carrots)
  • Extra Firm Tofu, Pressed Then Cubed
  • Rice or Noodles
  • Liquid Aminos (or soy sauce)
  • Garlic Powder
  • Onion Powder
  • Pinch of Ginger Powder

Other Stuff Needed:

  • Wok
  • Grill Pan
  • Bowl with Lid

Directions:

  1. Drain and press tofu. Put tofu between two plates. Make sure to put a sheet or two of paper towels under tofu. Put something heavy on it like a big box of veggie broth. Leave it alone until step 4.
  2. Boil water in large pot and add noodles OR start rice in the rice cooker.
  3. Heat the wok on medium heat. Add 1 tablespoon coconut oil. Add veggies and cook, stirring frequently. If the veggies seem to dry, add another tablespoon coconut oil. When the veggies seem mostly cooked, squirt (squirt! I love that word!) some liquid aminos all over the veggies. Sprinkle some garlic powder and onion powder over the cooking veggies, too. Stir.
  4. Tofu time! Take the tofu block and cut it in half. Cut the tofu into strips and then bite sized cubes. Take a bowl with the lid and squirt some liquid aminos in the bottom of the bowl. Add onion and garlic powder and a pinch of ginger powder. Stir with a fork.
  5. Add the tofu cubes, put on lid and shake the tofu around. (I use a pyrex bowl.) Squirt a little more liquid aminos and add another dash of garlic and onion powder.
  6. Heat grill pan on medium heat. Add 1 tablespoon coconut oil. Cook until tofu has nice grill marks and is nice and brown. Squirt 🙂 a little more liquid aminos on the tofu as it is cooking.
  7. Serve as you wish. I put the rice or noodles as the bottom layer in a deep bowl, scoop in lots of veggies, and top with crispy tofu.

We also squirt! (heehee) a little bit more liquid aminos on the entire dish. There is no need to add salt to this dish because the liquid aminos does it for you.

Notes:
If you don’t have a wok, use a sauté pan. If coconut oil isn’t safe for you, sub a safe neutral oil, such as olive oil or something similar. If you don’t have a grill pan, sauté the tofu in a pan until crispy.

This has quickly become a family favorite. My 5 year old complained because she gobbled up her tofu immediately and wanted more tofu. My child loves it! And I hope you and yours, will, too.

After writing this post, I’m sitting here saying, “Squirt, squirt, squirt, squirt!”  I don’t know why that word just tickles me pink.

Until next time, my friends.

Homemade Crispy Shake and Bake Tofu Tenders

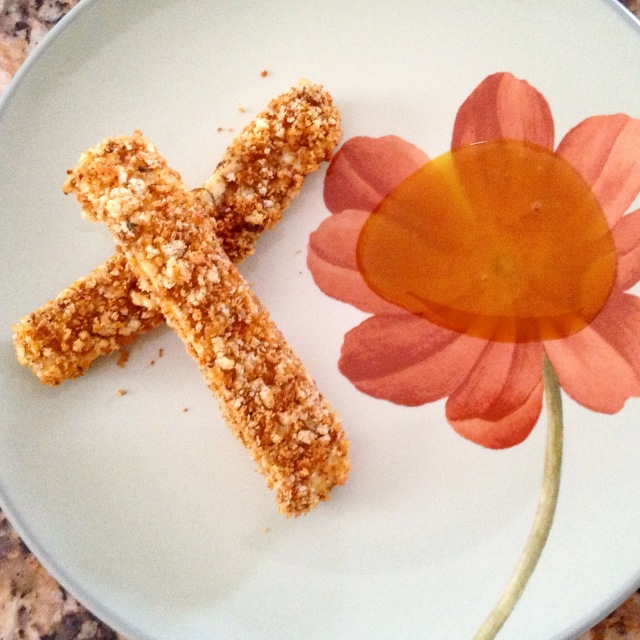
crispy-tofu-tenders

Crispy Tofu Tenders with Homemade Honey Mustard

I have begun to experiment with tofu.

I don’t know why it took me so long to research safe tofu companies. I got in touch with Nasoya and was told their facility is free of dairy, eggs and beef. SCORE!

Let the tofu love begin!

I have made tofu at home three times in a little over a week. I have made a tofu and veggie stir fry twice. Yum!

Last night, I decided to try an old chicken recipe with the tofu.

The result?

Mmmmmm… even the 5 year old liked it! (covered in ketchup, of course, but hey- she ate it happily!)

This recipe comes from allrecipes.com.

I have modified the spices a bit. Feel free to change the spices to ones you and your family enjoy.

I also use homemade bread crumbs, but store bought breadcrumbs or panko would work well, too.

This breadcrumb mixture made more than enough for half a container of tofu. I think I could have used this recipe for the entire package, but I was hesitant to use all the tofu in case this didn’t turn out. But it did and my little family loved it!

So tonight, we are having the other half of the tofu and I’m making these crispy shake and bake tofu tenders again! Along with some garlic mashed potatoes and maybe some stewed fresh green beans. And some homemade vegan gravy for the taters and beans… Mmmm, mmm! I better hurry this post up so I can cook- it’s almost dinner time already!

Ingredients:

2 cups breadcrumbs
3 Tbs canola oil
1/2 tsp salt
1 tsp paprika
1/8 tsp pepper
1/4 to 1/2 tsp garlic powder
1/2 tsp onion powder
1/4 tsp poultry seasoning
pinch (or a peench as we say) of basil, dried parsley & dried oregano
***********************************************************************
2 flax eggs (2 Tbsp of ground flax and 6 Tbsp of water mixed together)

1 package of extra firm tofu, pressed between two plates for about 20-30 minutes (do this in advance and cut the tofu into strips like chicken tender sized)

Directions:

  1. Preheat oven to 350. Line a cookie sheet with parchment paper.
  2. Prepare your flax eggs in a medium sized bowl and whisk with a fork. When the flax eggs are gelled and gooey, they are ready.
  3. Take everything above the starred line and mix it together in a gallon plastic baggie- adding the oil last. I like to shake the dry ingredients together first and then add the oil.
  4. Dip one tofu strip into the flax egg and then put it into the seasoned breadcrumb mixture and shake. Place the tofu strip onto a parchment lined cookie sheet (foil works, too, but parchment gives you no stick to the pan-ness! 😉 )
  5. Repeat with each tofu strip. If you run out of flax eggs, you will need to make another one (1Tbsp of ground flax & 3 Tbsp of water)
  6. Bake for 5 minutes. Gently flip the tenders. Bake for 5 more minutes. Flip tenders. Bake for another 3-4 minutes, or until tenders are crispy.

Notes:
Serve as you would serve chicken tenders, with a sauce or ketchup. (SG loves it this way.)
The Huzz and I prefer these crispy tenders cut up and served in a bowl along with other food. (Like in a salad or with a pasta dish with the tofu standing in for the chicken.)

It totally looks like chicken- but it doesn’t taste like it. The flavor is all in the crispy coating, so don’t be afraid to spice it up in the bag!

I hope y’all enjoy these crispy shake and bake tofu tenders.   (I’m still working on getting my Southern back, y’all! I kind of lost it from living in Ohio and Iowa for so long!)